Have you ever wanted to make a new piece of furniture? Or maybe just give something a makeover? You may have ripped out some boards with a table saw, but what if you don’t have one? A circular saw can be a great alternative if you know what you’re doing. So how to rip boards with a circular saw?
In this article, we’ll show you the step-by-step process for ripping boards with a circular saw. You’ll learn how to ensure your saw is properly set up, the tips for making a smooth cut, and what safety measures to take.
Read More How To Use A Circular Saw Without A Table Safely?
What is Ripping Boards?
Now let’s start by getting familiar with the basics to rip a board with a circular saw.
Ripping boards is the process of cutting them along their length to be used for projects or building furniture. It involves using a saw to make cuts along the length of the board. This type of cut is known as a rip cut, and it is typically used when creating larger pieces, such as shelves or table tops.
Why Use a Circular Saw to Rip Boards?
Circular saws have been around for a long time and are known for their power, versatility, and portability. They’re an essential tool for any workshop and great for making quick cuts.
Using a circular saw is one of the most efficient and cost-effective ways to rip boards. It is faster and more accurate than using a hand saw, jigsaw, or other type of saw blade. The circular saw also can adjust the depth of the cut, which is helpful when making furniture or other projects.
A properly set up circular saw is also much safer than other saws. It can prevent the board from splintering or breaking, reducing the risk of kickback and saw blade binding. Additionally, it’s easy to use and can be done with minimal setup time.
How to Rip Boards with Circular Saw?
Now that you know the basics, let’s discuss how to rip boards with a circular saw. This process involves four steps: preparing the area, mounting the board, aligning the saw blade, and making the cut. We’ll also cover the safety considerations for ripping with circular saw.
Preparing the area for ripping boards
The first step in ripping with a circular saw is to prepare your work area.
Setting up a workbench or sawhorse
A workbench or sawhorses should be used to support the board. Make sure the surface is level and stable, and be sure to secure it with clamps or other fasteners. This will help ensure the board does not move during the cutting process.
For boards that are too large for a workbench, use two sawhorses to support the board. Make sure the sawhorses are sturdy and secure, and use a straightedge to check that the board is level.
Selecting and preparing the board
The next step is to select the board for ripping. Choose a board that is straight and free of knots or other defects. It should be large enough to accommodate the saw blade and have enough surface area for a good grip.
Once you’ve chosen the board, ensure it is clean and debris-free. Use a brush or cloth to remove dirt or sawdust on the board. This will help keep the saw blade from becoming clogged.
Ensuring the area is clear of debris
Before cutting, ensure the area is free of any objects that may interfere with the saw. Remove anything that could be a hazard, such as rags, tools, or other debris. Be sure to remove pets or small children from the area, as they can be injured if they get too close to the saw.
Using a Circular Saw to Rip Boards
Now that you’ve prepared the area, you can start cutting.
Mounting the board
This step involves securely mounting the board to the workbench or sawhorses. To do this, position the board so that it is parallel to the saw blade. Make sure the board is flat and secure before you start cutting.
For larger boards, use clamps to secure the board in place. This will help prevent the board from moving during the cutting process. If the board is too large for clamps, you can use additional supports to secure it.
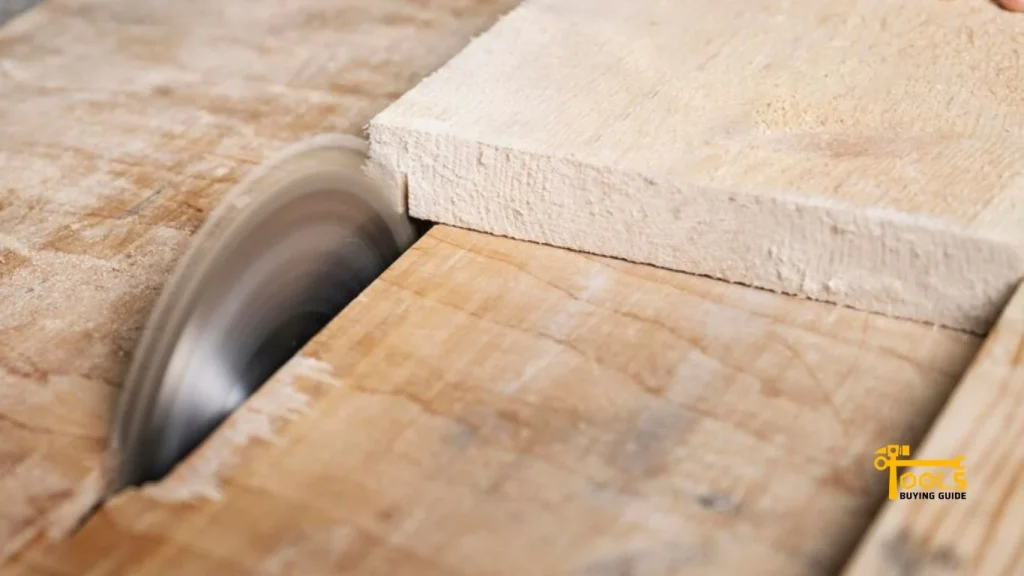
Aligning the circular saw blade
The next step is to make sure the saw blade is aligned correctly. The blade should cut along the edge of the board, with a small gap between the blade and the board. This will help ensure a clean, even cut. If you use a guide rail, ensure it is aligned with the saw blade.
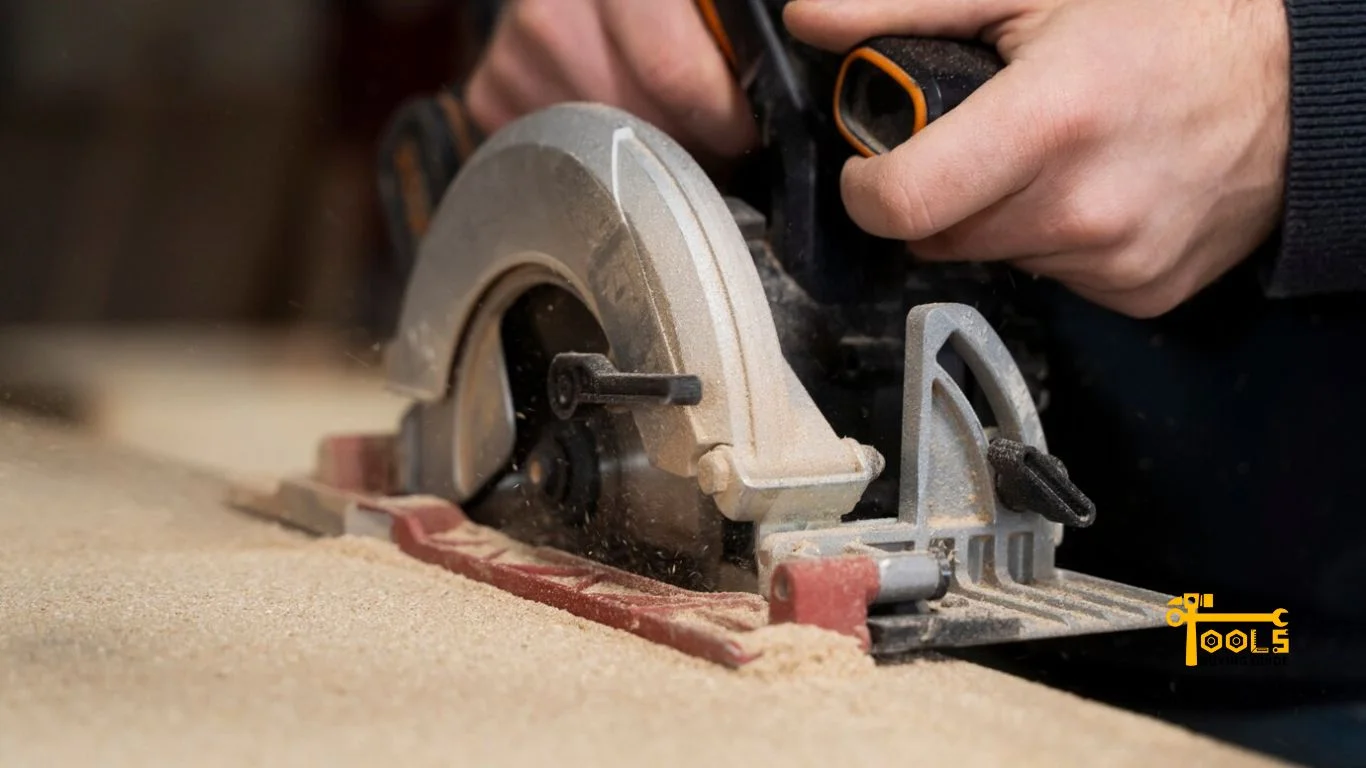
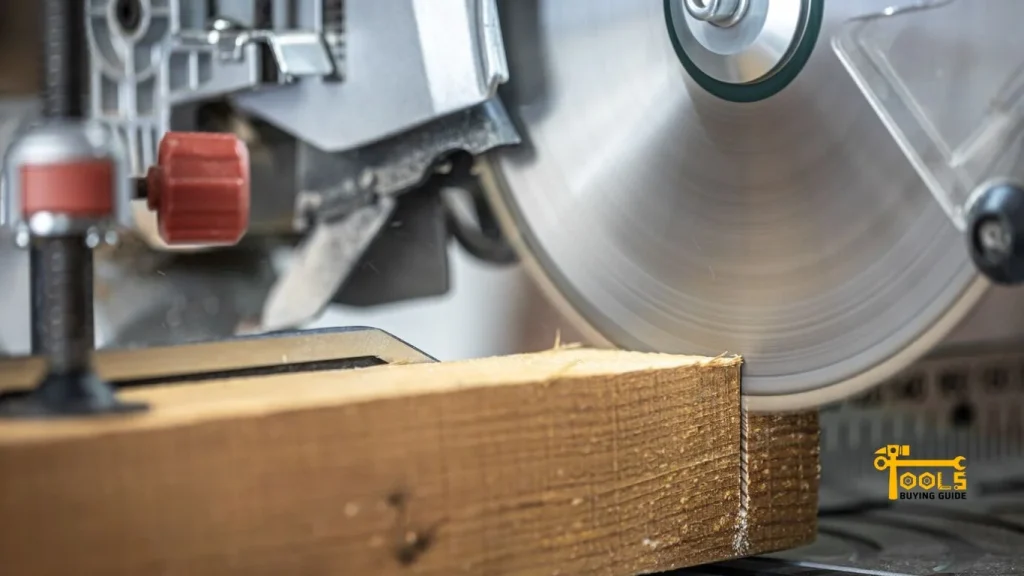
Making the cut
You’re ready to make the cut once the board and saw blade are properly aligned.
Start by turning on the saw and carefully making a shallow cut. Keep the saw moving at a steady pace, and make sure not to apply too much pressure. The blade should glide smoothly along the board with minimal effort.
When you reach the cut’s end, keep the saw moving until it is completely off the board. This will help prevent kickback and splintering.
For 4x4s or other larger boards, you may need to make two passes. Start with a shallow cut, then adjust the second pass’s depth. This will help ensure a clean, even cut. For 4x4s, two passes should be enough.
The depth of the cut should be slightly less than the board’s thickness. This will help prevent the saw blade from binding during the circular saw rip process.
Once you’ve finished the cut, turn off the saw and inspect the board. Make sure there are no rough edges or splinters. For boards used for furniture or other projects, you may want to smooth the edges with sandpaper before you continue.
Finishing the rip
After you’ve cut, you can finish the rip. This involves cutting along any remaining edges of the board to create a uniform shape. Depending on the project, you may also need to cut angles or curves along the board’s edges.
The Safety considerations for ripping boards
Ripping boards with a circular saw can be dangerous if not done properly. To ensure your safety, there are a few important steps to take.
Wear eye and ear protection
Always wear protective eyewear and ear protection when you’re using a saw. This will protect your eyes from dust, shavings, and other debris that may fly during cutting.
Ensure the saw is securely attached to the board
Ensure the saw is firmly mounted to the board before cutting. This will help prevent kickback and binding, which can cause serious injuries. Any bolts or screws attached to the saw should be secure and tight. If the saw is clamped, ensure it is properly aligned with the blade.
Keep hands clear of the blade
When cutting, keep your hands and fingers away from the blade. Even if the saw is firmly attached to the board, there may be a risk of kickback. Keeping your hands away from the blade will help reduce this risk.
Also Read Table Saw vs Track Saw: Which Is the Better Tool?
Frequently Asked Questions
The secret to ripping boards straight with a circular saw is all in the setup. Make sure your saw’s base plate is secured firmly against the edge of the board and is square with the cut line. Keep a steady pace and let the blade do its job; don’t push too hard, or you might risk kickback.
The best tool for ripping boards depends on the job at hand. A table saw, or jigsaw can be great choices if you need to make long, straight cuts. But if you’re looking for a quick and easy solution, a circular saw might be the way to go.
Safety should always be your priority when working with any power tool. Make sure you wear the proper eye and ear protection, and make sure the area is free of debris. Secure the board firmly with clamps or a vise, and double-check your setup before turning on the saw. Finally, use a push stick to keep your hands away from the blade safely.
Ripping a 4×4 with a circular saw is doable but requires extra care. Start by setting the blade depth to 3/4 inch and raising the blade guard. Then, secure the 4×4 firmly against a surface, like a workbench or a sawhorse. Make sure you don’t push the saw too hard and that you keep a steady pace.
You will need a saw with a deeper blade and an even sturdier setup for ripping thick boards. Adjust the blade depth accordingly and secure the board more firmly with clamps. As always, be aware of kickback and use a push stick to keep your hands away from the blade.
Conclusion
Ripping boards with a circular saw is an easy and efficient way to make accurate cuts. This guide on how to rip boards with a circular saw has outlined the basic steps and considerations to get you started.
Utilizing the right blades, taking safety precautions, and following the steps outlined above, you can make exact lengths of wood for any project. But don’t forget to leave enough extra material for any mistakes or adjustments that may occur! With the right preparation, you can be a master of woodworking and have the perfect cut every time. Good luck