
Have you ever wanted to use a circular saw without a table? Circular saws are incredibly useful for making straight cuts and other projects around the house. Unfortunately, they’re not always easy to use without a table. If you’re in a bind and need to use your circular saw without one, how do you use a circular saw without a table?
In this article, we’ll discuss how to use circular saw without table. We’ll discuss the importance of safety and how to set up your environment for success. Let’s get started!
How to Use A Circular Saw Without A Table?
Before you get started, there are a few things you need to do to make sure your project is successful and safe.
Safety precautions for using a circular saw
Safety should be your number one priority when using any power tool. Before you begin, wear the appropriate safety gear, such as eye protection, gloves, and ear defenders.
When using a circular saw without a table, you must be extra careful, as there’s no additional support for your saw. Ensure you are not standing too close to or in front of the saw when it is running.
Then, ensure the area you’re working in is free from any water or other liquids that could interfere with your project. Carpets, rugs, and other surfaces should be cleared out of the area to prevent accidents.
Finally, make sure that you have a stable surface to work on. If you’re working on a table or bench, ensure it is steady and won’t shake when the saw is turned on. If you’re working on the ground, ensure the surface is free from any obstacles that could interfere with your cutting.
Read More: Tips To Use Dowel Jig

Step By Step Guide for Using Circular Saw Without A Table
Step 1: Set up your workspace and prepare the saw:
Now that you’ve taken the proper safety precautions, it’s time to set up your workspace and prepare the saw.
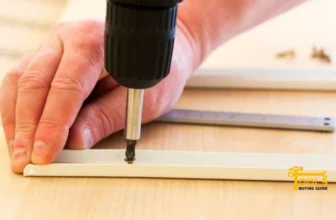
Tools Needed:
- Circular saw
- Marker or pencil
- Measuring tape
- Straight edge guide (optional)
- Clamps (optional)
- Protective gear (eye protection, ear defenders, gloves)
Once you’ve gathered your tools, you can begin setting up your workspace.
Select a suitable surface
The next step is to find a suitable surface for your project. A flat surface at least twice as long as the saw blade is ideal. If you don’t have access to a table or bench, use a sheet of plywood or particleboard.
When selecting a surface, ensure it is sturdy and won’t move around when cutting. If you’re working on the ground, ensure the surface is free from debris and other objects that could interfere with your cut. Give yourself plenty of room to work and keep your saw level.
Position the saw correctly
Once you’ve selected a suitable surface, it’s time to position your saw correctly. Make sure that the saw is aligned with the edge of the material and positioned so that the guard is in front of you when cutting. This will help protect you from flying debris and reduce the risk of injury.
You can use a carpenter’s square to check the blade angle to ensure your saw is level. You may also want to adjust the speed of your saw so it’s slow enough for accurate cuts but fast enough to get the job done quickly. Make sure to read through your manual and follow all instructions before starting.
Check the cord
Next, make sure to check the cord of your saw. If you notice any frayed wires or exposed cords, immediately replace them before using the saw. This is a safety precaution that will keep you safe and help ensure that your project turns out properly.
When checking the cord, ensure it’s properly connected to the saw and plugged into a power source. You should also check that the cord is long enough for your project. If it’s not, you may need to use an extension cord or find another way to power your saw.
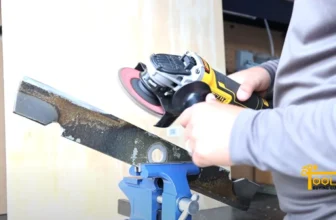
Secure the blade guard
After checking the cord, make sure to secure the blade guard of your grinder saw. This is an important step as it will help prevent accidents. Check the guard before every use to ensure it’s in good condition and not damaged or loose.
The blade guard should be properly secured before you start the saw. If it’s not, there’s a chance that debris could fly out when the blade is running. Ensure the guard is in place and secure before turning on the saw.
Set the cutting depth
Once the blade guard is secured, setting the cutting depth is time. This will help ensure that your project turns out properly and that you don’t overcut or undercut the material. Read through your manual and follow any instructions regarding cutting depth.
If you don’t have a manual, check the saw to see if the depth adjustment is marked with numbers or lines. Set the blade so it’s at least 1/16 inch above the material for more accurate cuts. You may need to adjust the depth accordingly if you’re cutting thick material.
Adjust your speed settings
Finally, make sure to adjust your speed settings before beginning your project. The speed setting of the saw depends on the type of material you’re cutting and the size of the cut. Generally speaking, a slow speed is best for smaller cuts, and a higher speed is best for larger cuts.
Read through your manual and follow any instructions regarding speed settings. Most saws have dials or switches that you can use to adjust the speed of the blade. Also, check the maximum speed rating of the saw before adjusting the settings, as going too fast could cause damage to the tool or the material.
Step 2: Begin cutting with the circular saw
Now that you’ve taken all the necessary safety precautions and set up your workspace, it’s time to begin cutting. Here are a few tips for successful cuts with your circular saw without a table.
Align your material with the guide
First, make sure to align your material with the saw’s guide. This will help ensure that you make straight and clean cuts. If you’re cutting a long piece of wood, using a clamp or other device may be helpful to hold the material in place while cutting.
Use a ruler or other measuring tool to double-check the alignment before beginning your project. This will help ensure your cut is as straight as possible and reduce the risk of mistakes.
Hold down the saw firmly
Next, make sure to hold the saw firmly when cutting. This will help ensure accuracy and minimize any kickbacks or vibrations from the saw. Using two hands when operating the saw for extra stability is also a good idea.
Also, be aware of where your hands are at all times. Keep them at least 6 inches from the blade to reduce the risk of accidents. Additionally, make sure to use a firm grip on the saw when cutting and be careful not to let it slip out of your hands, as this could lead to injury.
Start the motor and make your cut
Finally, when you’re ready to start cutting, turn on the motor and begin cutting. Start with a slow speed and gradually increase as needed. As you cut, be aware of any kickbacks or vibrations that may occur and adjust your grip accordingly.
When turning on the saw, keep your hands away from the blade and wear appropriate protective gear, such as gloves and safety goggles. This will help protect you from flying debris and reduce the risk of injury.
Once your cut is complete, turn off the saw and unplug it before removing any remaining debris from the cutting area.
Step 3: Finishing up cutting with a circular saw
Here are a few circular saw tips to help you finish your project:
Check your work for accuracy
When you’re done cutting, make sure to check the accuracy of your work. Use a ruler or other measuring tool to double-check your cuts and make any adjustments where needed. This will help ensure that your project looks professional and meets your expectations.
Turn off the saw and unplug it
Once you’ve checked your work, turn off the saw and unplug it. This will help prevent accidents while you’re not using the tool.
Remove any remaining debris
Finally, clean up the cutting area by removing any remaining debris. This will help ensure a safe and organized workspace for your future projects.
You can use a broom or vacuum to quickly and easily clear away any debris that may have been left behind from cutting. This is an important step as it will help prevent any hazards from occurring in the future.

Additional Tips and Tricks
Using a circular saw with table or without a table can be tricky, but with the right knowledge and preparation, you can easily master this skill. Here are some additional tips and tricks to help you make the most out of your circular saw:
Use a clamp to secure the material in place
Using a clamp to keep the material in place while cutting will help ensure accuracy. This will also prevent the material from moving around or shifting as you cut.
Wear protective gear
Wear protective gear, such as gloves and safety goggles, when using a circular cheap saw without a table. This will help protect your eyes and hands from flying debris during cutting.
Cordless circular saws for greater maneuverability
To achieve greater maneuverability, consider investing in a cordless circular saw. This will give you more freedom to move around and make cuts from any angle or position.
Straight-Edge guide to achieving more accurate cuts
Using a straight-edge guide will help ensure that your cuts are as accurate as possible. Make sure to align the straight-edge guide with the material before beginning your project to guarantee precise and accurate cuts.
Change the blade regularly
Make sure to change the blade of your circular saw regularly for optimal performance. This will help ensure that you make clean and smooth cuts every time.
Store your saw in a safe place when not in use
When not in use, store your saw in a safe place, such as a toolbox or cabinet. This will help keep the saw away from children and pets and prevent accidents. It’s also a good idea to unplug the saw when it’s not in use to reduce the risk of fire or electric shock.
Frequently Asked Questions
A table saw is the best tool for cutting wood with a straight edge. It’s fast, accurate, and easy to use. If you’re looking for something more affordable, try a circular saw or jigsaw- both are great options for DIY projects.
The simplest way to get a nice, straight cut in wood is with a table saw. It’s also the safest option, preventing kickbacks and allowing for more accurate cuts. If you don’t have access to a table saw, a circular saw or jigsaw can also be used effectively.
If you don’t have access to a table or saw, there are still plenty of ways to work with wood. You can use hand tools like chisels and planes for intricate projects such as carving or sculpting. Alternatively, you could try using an electric jigsaw for larger cuts.
Cutting wood straight by hand requires a sharp blade and steady hands. You can use a handsaw to make long, smooth strokes or a coping saw for shorter, sharper cuts. A combination square or carpenter’s square will help guide your cuts in a straight line.
Cutting thick wood with a circular saw can be tricky. First, ensure your blade is sharp, and the teeth are pointed downward. Then, adjust the depth of the cut and use a straightedge to guide your cuts. Start slowly and take your time- this will prevent the saw from binding or kicking back. For extra safety, wear safety glasses and ear protection.
Conclusion
For those needing a quick and easy solution for cutting without a table, the circular saw is your best bet. You don’t need fancy tools or complicated equipment just a circular saw and basic safety gear. With the right technique and practice, you’ll be sawing effortlessly in no time.
This step-by-step guide on how to use a circular saw without a table should have given you an idea of what you need and some tips on getting the job done right. And remember, always wear eye protection and hearing protection when using any kind of power tool! Good luck out there.


[…] AUTOTOOLHOME Woodworking Dowel Jig is a simple, easy-to-use jig and the best dowel jig kit. You can use it for both softwood and hardwood doweling. The Jig allows you to make perfectly even holes in your projects, which makes it ideal […]
[…] this article about the best track we saw. As we mentioned, it is a powerful and portable saw that you can use for cutting wood or other materials in your home or workshop. However, it’s important to remember that the […]