The tiles in your home can be a great way to add character and style. But what if you want to cut tile in an unusual shape? You can use an angle grinder to finish the job quickly and easily. You must understand how to cut tile with an angle grinder to do this right.
To help you out, we’ve prepared a guide for beginners and professionals alike. We cover all the steps you need to take, tips and tricks to make the job easier, and alternative methods for cutting tiles. Read on and learn how to make the perfect cuts with an angle grinder.
Step-by-Step Guide: How to Cut Tile With a Grinder?
To cut tile with an angle grinder, you need to take the following steps:
Step 1: Gather the tools needed for the job
Before you start, prepare all the tools required for cutting tile with angle grinder. Here are the items you will need:
- Angle grinder
- Cutting blade (preferably a diamond blade)
- Safety glasses and gloves
- Ear plugs or ear muffs (for protection from the loud noise of the grinder)
- A measuring tape
- Pencils or markers for marking the areas to be cut.
Step 2: Select the right blade for cutting the tile
You need to select the right blade for cutting the tile. Make sure to choose a diamond blade designed specifically for cutting tile with a grinder, as it is the most effective and long-lasting blade type. Several types of blades are available, including continuous rim blades or segmented rim blades.
Continuous rim blades are the best choice for small tiles as they can make extremely precise cuts. For large tiles and thicker materials, segmented rim blades are better suited. The number of teeth on the blade also determines how fast and precise the cuts will be.
Step 3: Mark and measure the area
Once you’ve selected the right blade, it’s time to mark and measure the areas that need to be cut. Use your measuring tape and pencil or marker to trace the shapes needed for cut tile with a grinder. Make sure your measurements are precise, as any miscalculations can lead to mistakes in your cuts.
To measure, start by placing a straight edge across the tiles and mark any points that need cut. Then use a ruler or measuring tape to measure from point to point and record your measurements for reference. You should also use a square or level to check the measurements for accuracy.
Step 4: Adjust the cutting depth
Once you’ve marked and measured the area, it’s time to adjust the cutting depth. This is an important step, as having the wrong cutting depth can lead to uneven tiles. Use the adjuster on your grinder to set the right depth to get the perfect cut. The depth should be the same as the thickness of your tile.
Step 5: Secure the tile firmly
The next step is to secure the tiles firmly before you start cutting tile with a grinder. This will help prevent breakage and ensure that your cuts are accurate. You can use clamps to hold down the tiles or attach them to a workbench with screws. Make sure the tiles are secure before you start cutting. This will also ensure that your cuts remain straight and you don’t have weird angles or curves.
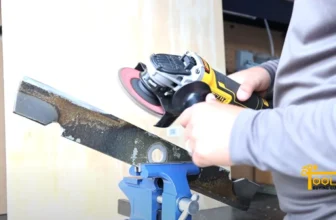
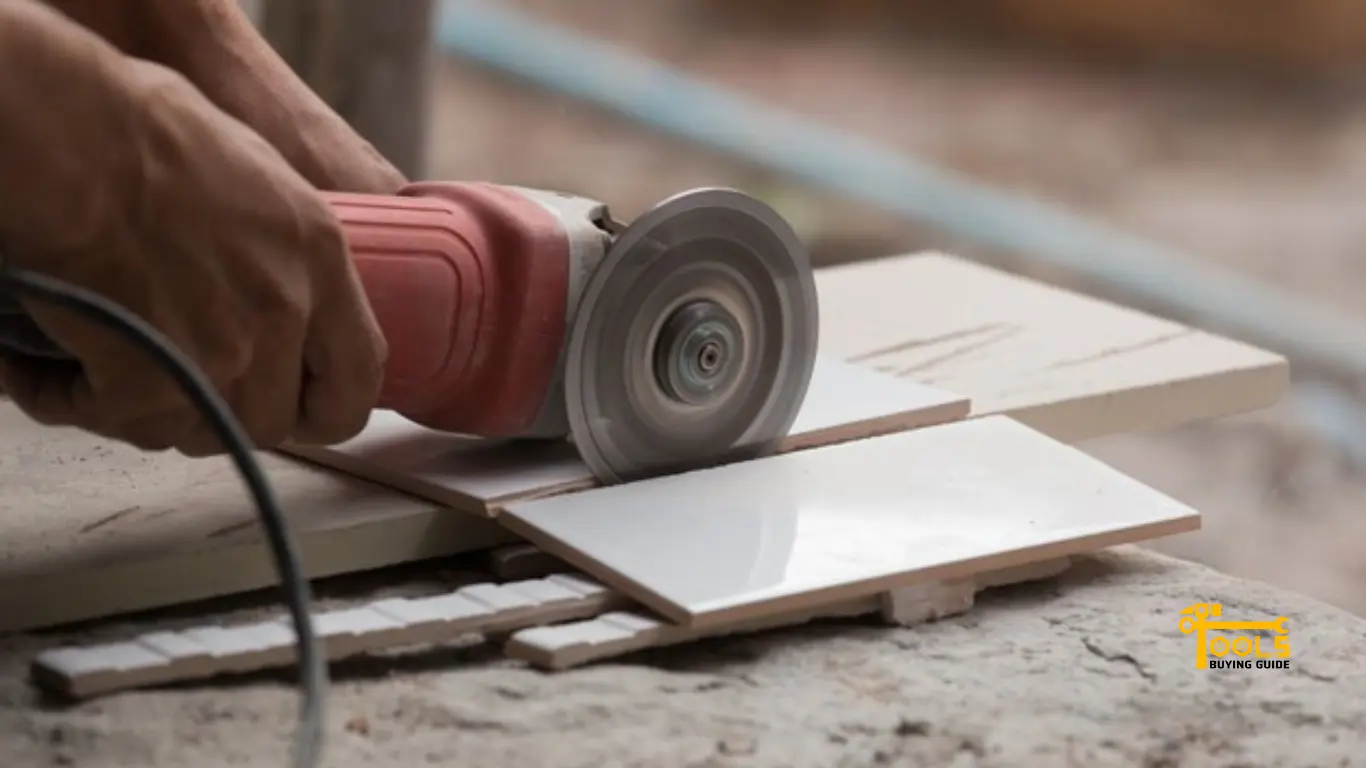
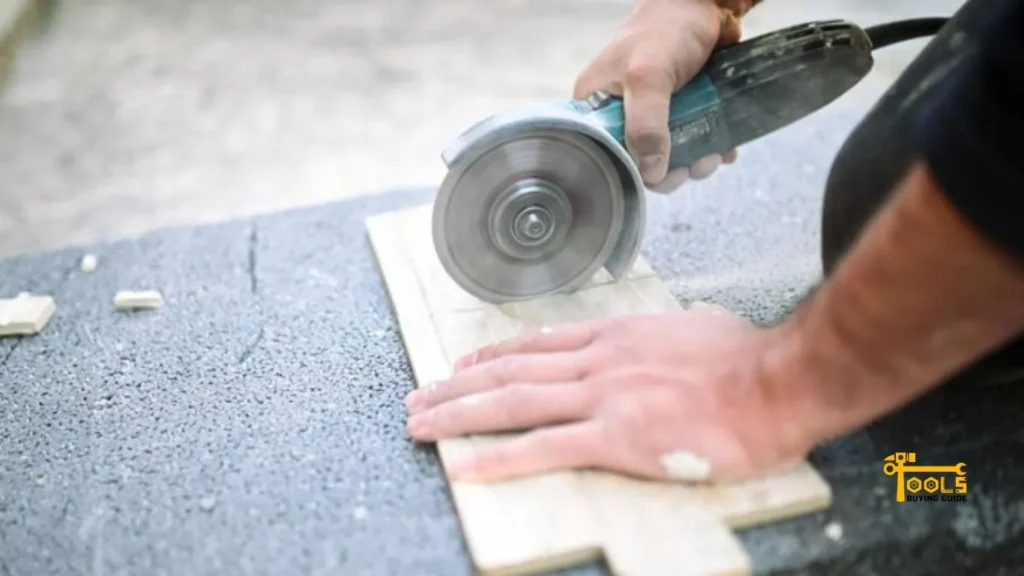
Step 6: Start cutting the tile
After you’ve secured the tiles, you can start cutting. Place the grinder blade against the tile and turn on the power. Keep a firm grip on your tile grinder and guide it along the measured lines while keeping an eye on your cutting depth. Move slowly so you don’t make any mistakes or end up with uneven cuts.
Do not force the grinder, which can cause the blade to overheat or break. Move gently and patiently to get a clean, precise cut. Tiles are also susceptible to breaking, so take extra care when cutting them.
If you are cutting curved edges, it is best to start from the inside of the curve and work your way out. This will help ensure that your cuts remain even and smooth. After finishing one cut, turn off the grinder and move on to the next one.
Step 7: Stop and cool down the blade when necessary
Stop and cool down the blade when cutting tiles with an angle grinder when necessary. This is especially important for thicker materials as they can generate much heat. Allow the blade to cool down for at least five minutes after every cut to avoid damaging it or causing yourself injury.
Step 8: Smooth out rough edges, if needed
Once you’ve finished cutting the tiles, it’s time to smooth out any rough edges. To do this, you can use a tile file or sandpaper to even out the edges. You can also take extra precautions by wearing gloves and safety glasses during this process.
Step 9: Clean up any debris created by cutting
The last step is to clean up any debris that has been created in the process of cutting your tiles. Use a shop vacuum or broom to gather up any dust and dirt created. Be sure to dispose of the debris properly to keep your workspace clean and safe.
Tips And Tricks to Cut Tile With an Angle Grinder
Here are some tips and tricks to help you get the best results when cutting ceramic tile with angle grinder:
- Use the right grinding wheel for your tile type. Different tiles require different blades, so use the right one for your tile material.
- Make sure to use a wet saw for intricate cuts, as this will help prevent chipping and breakage of the tile.
- Always sharpen and clean the blade before using it to ensure the best results.
- Use angle grinders with dust extraction systems to keep your workspace clean and dust-free.
- Monitor the temperature of your blade to avoid any overheating or damage.
- Take extra care when cutting curved edges, as they can be tricky and require more precision.
- Change out blades regularly for a clean cut and to prevent debris build-up.
Following these steps and tips, you can quickly and efficiently cut tile with an angle grinder quickly and efficiently.
Alternatives To Cutting Tile with an Angle Grinder
For those who don’t want to use an angle grinder, some other options are available. Here are some alternatives that you can try:
A wet tile saw for thicker tiles
A wet tile saw is one of the best alternatives to an angle grinder for cutting thicker tiles. It has a water-cooled blade, which helps prevent overheating and breakage. It also allows you to make intricate cuts with more precision than an angle grinder can provide.
To use a wet tile saw, you just have to place the tile in the frame and adjust the blade depth according to your requirements. Then switch on the power and move the blade back and forth while continuously spraying water from the built-in sprayer. This will help cool down the blade and remove any debris created.
Using an oscillating multitool
An oscillating multitool is another great alternative to cutting tile with an angle grinder. These tools are designed for making detailed cuts in all materials, including tiles. They have a small blade that vibrates back and forth at high speed, allowing you to make precise cuts without chipping or cracking the tiles.
You must attach the blade to the tool and adjust the cutting depth before starting. Then switch on the power and guide it along your measured lines while holding it firmly in place. Keep an eye on the temperature of the blade so that you don’t overheat it.
A handheld manual tile cutter
A handheld manual tile cutter is the perfect solution for those who don’t want to use electricity. This tool features a small wheel that you can run along the tile’s surface to score it. After scoring, you just have to snap the tile along the line, and it will break apart cleanly.
However, these tools can only be used on straight lines and don’t allow for intricate cuts. So if you need to cut a curved edge or other complex shape, this might not be the best option.
Using a tile nipper for intricate shapes
Finally, consider using a tile nipper if you need to make intricate cuts in your tiles. This tool is designed to make detailed cuts in hard materials such as tiles. Its small, sharp blades can easily cut through the tile without causing any damage or chipping.
Just place the blade of the tile nipper against the tile and gently squeeze it. This will help you make detailed cuts in your tiles without any hassle.
Frequently Asked Questions
To cut the tile straight with a grinder, mark the line you want to cut. Use your grinder equipped with a diamond blade to score the tile along the marked line. Then, break the tile along the scored line after the score is deep enough. For a cleaner cut, use a wet saw.
You’ll need a diamond-tipped hole saw attachment to cut a hole in the tile with an angle grinder. Mark the center of where you want to make the hole, then align the center tip of the saw with your mark. Turn on your grinder and slowly press down as you work the saw around in a circular motion.
The best angle grinder blade for cutting tile is a diamond-tipped blade. Diamond blades last longer than other blades, making them the most cost-effective option for cutting tile. They also cut through porcelain and ceramic tiles quickly and accurately.
If you don’t have access to a wet saw or tile cutter, you can use an angle grinder with a diamond blade to cut the tile. Score the line where you want to make your cut (or drill a hole if needed), then snap the tile along your scored line.
Cutting tile wet using an angle grinder is generally best, as the water will help lubricate and cool the blade. This reduces dust and disperses heat to prevent tiles from cracking or shattering. However, you can cut tile wet and dry using a tile saw. For clean cuts, it’s usually best to use a wet blade.
Conclusion
If you’re ready to tackle a tiling project, cutting tile with an angle grinder may be the way to go. Now you know how to cut tile with angle grinder like a pro, just don’t forget to wear safety glasses and gloves.
With the right preparation, a few easy steps, and some practice, you’ll be tiling like a professional in no time! Have fun with your projects, and don’t forget to show off your finished work.